


This was a fun game with beautiful figures. It will be run on Sunday at the Huzzah! convention. Don't miss it. Plenty of photos are included below.


 This is the third time I've run this Dennewitz game. The first time was a play test in my basement, the second was at my club's game night. Both of those playings left us a little short on time to play to completion, so this time I hosted it at our club's game day, knowing that this venue presented plenty of time to play the game to completion.


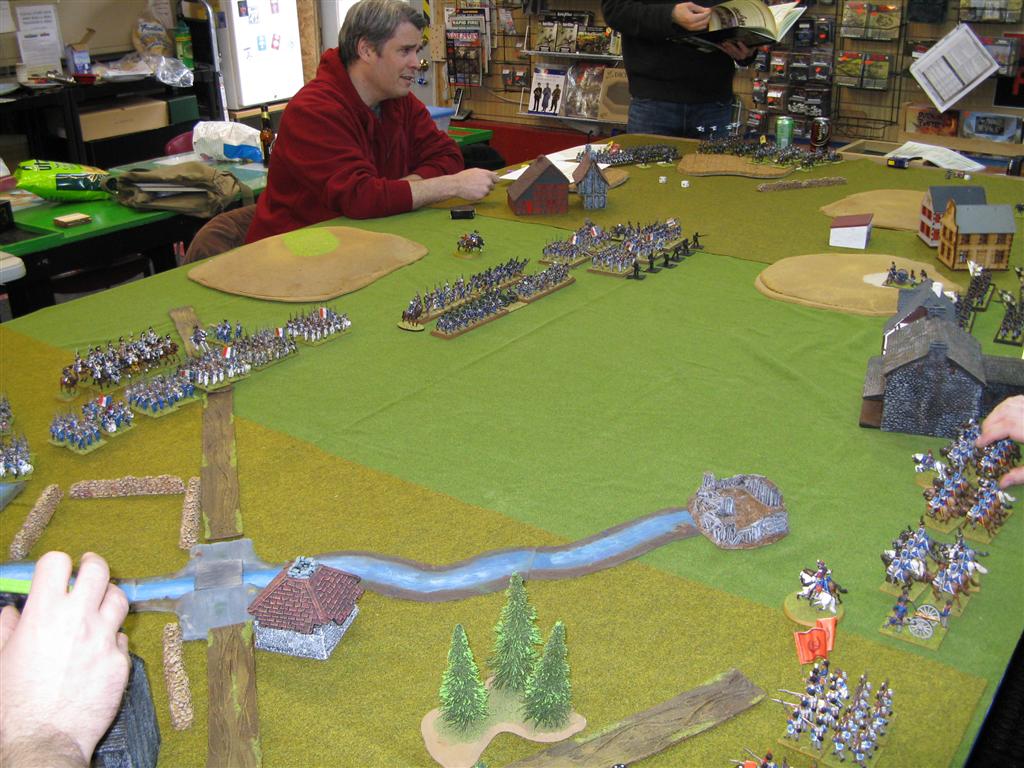
 This is a photo of the table before the game. The Prussian Advanced Guard division is waiting to be deployed, as are the initial French on-board forces. The French deployment zone is marked by the red cord on the tabletop. Not shown in my earlier post about the terrain are the flocked wooded areas and some new 15mm trees I scratch-built for the game unsing my laser and some Woodland Scenics foliage clusters.
 French turn one. The on-board French (mostly the Italian division) forces have deployed along the Agger. Just arriving on the table are the first divisions of the Saxon corps.

 This is a close-up of the area around Dennewitz at about turn three or four. The brown pipe-cleaner markers denote troops that are stationary in Volley and Bayonet. For those unfamiliar with these rules, this is the highest state of order and represents a brigade that is formed and prepared to defend against attack through ranged or melee combat. Visible at the bottom-right of the screen are brigades of my new Saxon corps. At the very top of the screen, the Italians have sent a solitary brigade across the Agger to attempt to turn the Prussian left flank.
 Late in the battle Ralph (Speedo) Gero checks to range in his artillery on the Prussian lines. Other Volley & Bayonet mailing list members visible are me (behind the soda bottle with AJ on my shirt) and Ed Mueller (left checkered shirt).
 I've spent the majority of my hobby time the past couple of weeks preparing to host another Dennewitz game. This next one will be this upcoming Friday at my club's monthly game night. When possible I like to play test my scenarios at home before subjecting the club to them. This helps me work out any kinks in the scenario and get things balanced so the game is fun for both sides, even if this means tweaking the forces or arrival times a bit. The test run of this scenario (see my previous updates below) went well. The published scenario seemed well balanced and the decisions of the players in my first game dictated the outcome, which is my preference. Since I didn't have to work on the scenario, this gave me extra time to work on other aspects of the game, starting with the pictured dedicated terrain cloth. I expect that I will be running this game a few times so I took the time to flock a felt with all the roads in place for the battle. This makes a much nicer looking tabletop but still allows be to set up the game rapidly at location away from my home.
 One of the things that we as wargamers have to deal with in our games is distortion of scale. Figure scale, ground scale, time scale are all balanced to try to give a good playable game while maintaining as much historic accuracy as possible. Most gamers try to match the scale of their buildings to the figure height scale, i.e. 15mm buildings with 15mm figures. In the past I have also done this. Recently my uncle Ralph has been using 6mm buildings to represent towns in his 15mm V&B games under the assumption that these more accurately match the ground scale and have the benefit of not making towns and villages occupy an unreasonably large amount of the tabletop. Considering that Dennewitz has eight (8) towns on it's small tabletop I found that this necessitated that I adopt Ralph's philosophy and build up eight town blocks using 6mm terrain. I chose to buy my buildings from T
 imecast Models from the UK. I chose them because they had a good selection of Eastern European models suitable for Napoleonic battles. The top photo here shows a close-up of one of my town blocks using Timecast's walls and buildings. The buildings are removable for when the town is occupied by a stand of troops. This allows the town to occupy a minimal footprint on the game table. The photo to the right shows a wider-angle view of a couple of the towns bracing the marshy-banked river that is a central feature of the battlefield. The 6mm bridge is also a Timecast model.
 I was still missing a couple of stands of Dragoons mounted on linear stands, so I also painted them up. Per the recommendations of the members of the Volley & Bayonet Yahoo group I added a light wash (made by diluting my 25mm wash) to emphasize the details of the figures. I was a bit gun-shy about using the full strength wash in fear that it would muddy the figures too much, but in the end I think I swayed the other way a bit too much and could probably have diluted it less for a stronger effect. Still it's an improvement over the non-washed figures. It also shows up a bit more in person than in photographs under incandescent light.
 After hosting Dennewitz at my house and enjoying the scenario, I decided that I should bring the game to my club's game night in February. In order to do so I thought it would be best to try to paint up the figures that I borrowed from my friend Ed to run the first game. The Prussians have a very interesting organization in this battle. Each infantry brigade (as the Prussians call it, functionally they're the same as other army's divisions) contains three regiments of infantry including some light infantry skirmishers, a battalion of artillery, and a small regiment of cavalry. These small regiments are based in Volley & Bayonet on linear cavalry stands - something that is fairly uncommon, so I needed to paint up figures specifically for this purpose. I also didn't have any massed Landwehr cavalry yet and the scenario requires a unit of that as well. While I had the figures on the table I also painted up a mounted Landwehr officer to represent General von Lindenau, commander of the Prussian advanced guard division. Since the advanced guard division is comprised almost entirely of Landwehr, I thought an officer in a Landwehr uniform was called for.


 On turn one the French immediately occupied Dennewitz, but surprisingly were pushed right back out in the Allied half of turn one by the Russian Olplechne. The marshy stream on the south side of Dennewitz made subsequent assaults on Dennewitz too difficult and the French chose instead to roll up their heavy artillery battalions and set in for a siege of the town via artillery fire from the neighboring hillside.
 On the left flank, initial Russian cavalry units on the battlefield met the advancing French troops outside of Goehlsdorf. When I was reading the order of arrival for the battle and the objectives I didn't anticipate the battle lines ending up running through Goehlsdorf, but that's indeed how it developed in our game. In the next few turns both sides deployed their arriving troops along the battle line running from Dennewitz to Goehlsdorf. During the confusion of this deployment, one regiment of Prussian dragoons (a linear V&B stand) chose a target of opportunity, and charged the heavy artillery battalions that were shelling Dennewitz in the flank. A successfull melee on the first battalion was followed up by a breakthrough charge on a second battery routing both. The following turn the French countercharged the blown Prussian dragoons and annhilited them, but the Prussian players thought that one regiment of dragoons was a fair trade for two battalions of heavy artillery. Other than this exchange the next few turns consisted of scattered long-range artillery fire and further deployment of the arriving armies.
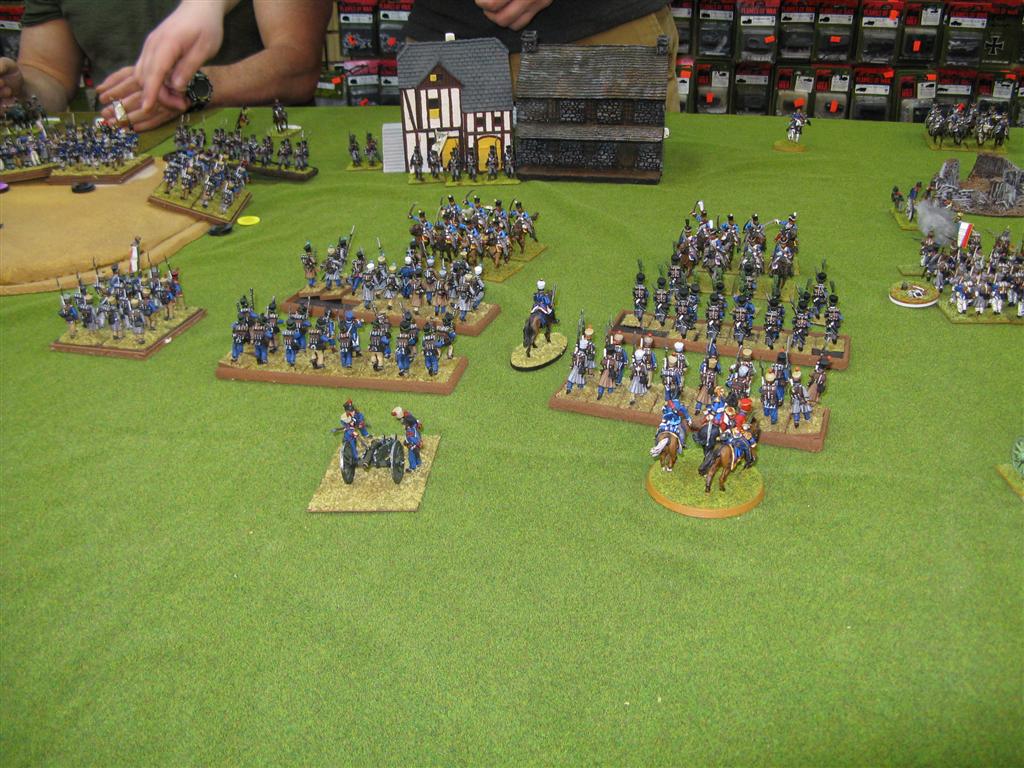
 On turn five the fighting began in earnest and also came to an instant climax when a combined Saxon and Italian charge on the Prussian center faltered and resulted in the Saxon and Italian troops falling back through their own reinforcing line disordering it. The following Prussian countercharge was sucessful across the line (with the exception of one stubborn Saxon artillery battalion that held its ground firmly) in routing the repulsed Italians and Saxons en masse opening up a huge gap in the French center. The photo to the left was taken part way through the resolution of the combat on the Prussian turn.
 West of Goehlsdorf, theFrench cavalry which had just arrived deployed to guard the French left flank and help support the troops occupying the town. The Russian reserve cavalry was marching to the area and Phil hoped to bottle them up before they could deploy.
 The final turn saw French counter charges across the board, but the Prussians held firmly even though the constant fighting had prevented them the opportunity to go stationary. With the primary victory conditions being exhaustion of enemy divisions the Allies were clear winners with no exhausted divisions and they held the Windmill heights for a total score of -1 for the French. The French had 3 divisions exhausted (including one collapsed). The result of the battle a solid Allied victory.
 When I decided to host Dennewitz, I scanned the OB and thought to myself, 'Wow, I have everything I need for this!' Then the day I sent out the invitatinos for the game I realized that there was one glaring exception to my assumption. I didn't have any Saxons....and there's a whole CORPS of them in this OB. Lucky for me I had the weekend free and the Saxons used French uniforms so I happened to have some unpainted figures that would be appropriate in my 'dead lead' box. I decided to try my hand at some 'speed painting' using a black primer technique and see if I could paint up a few units. The flags are from warflag.com printed on plain paper. There are two figure conversions in these units, but until I can get better close-up photos I'm going to leave them a secret.
