Saturday, August 11, 2018

Northern Conspiracy August 2018 Game Night

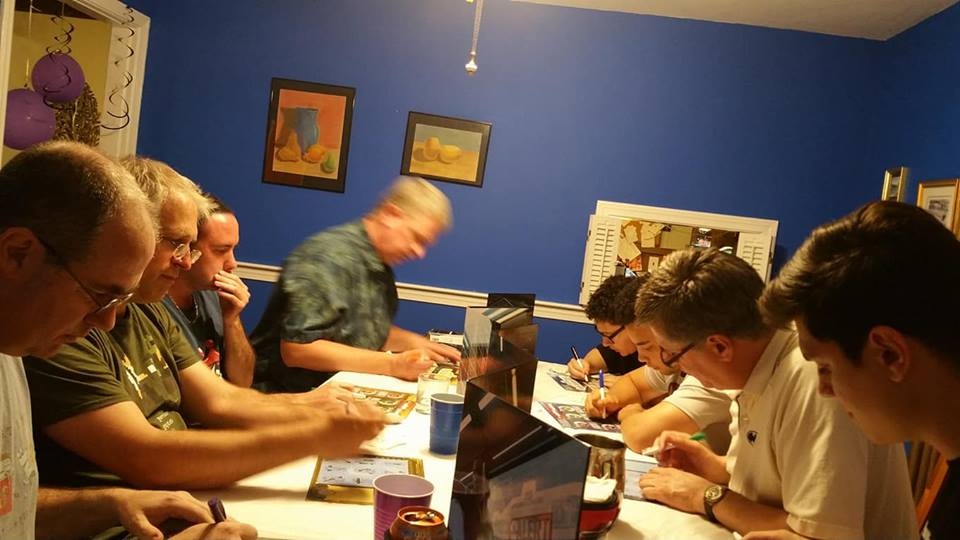
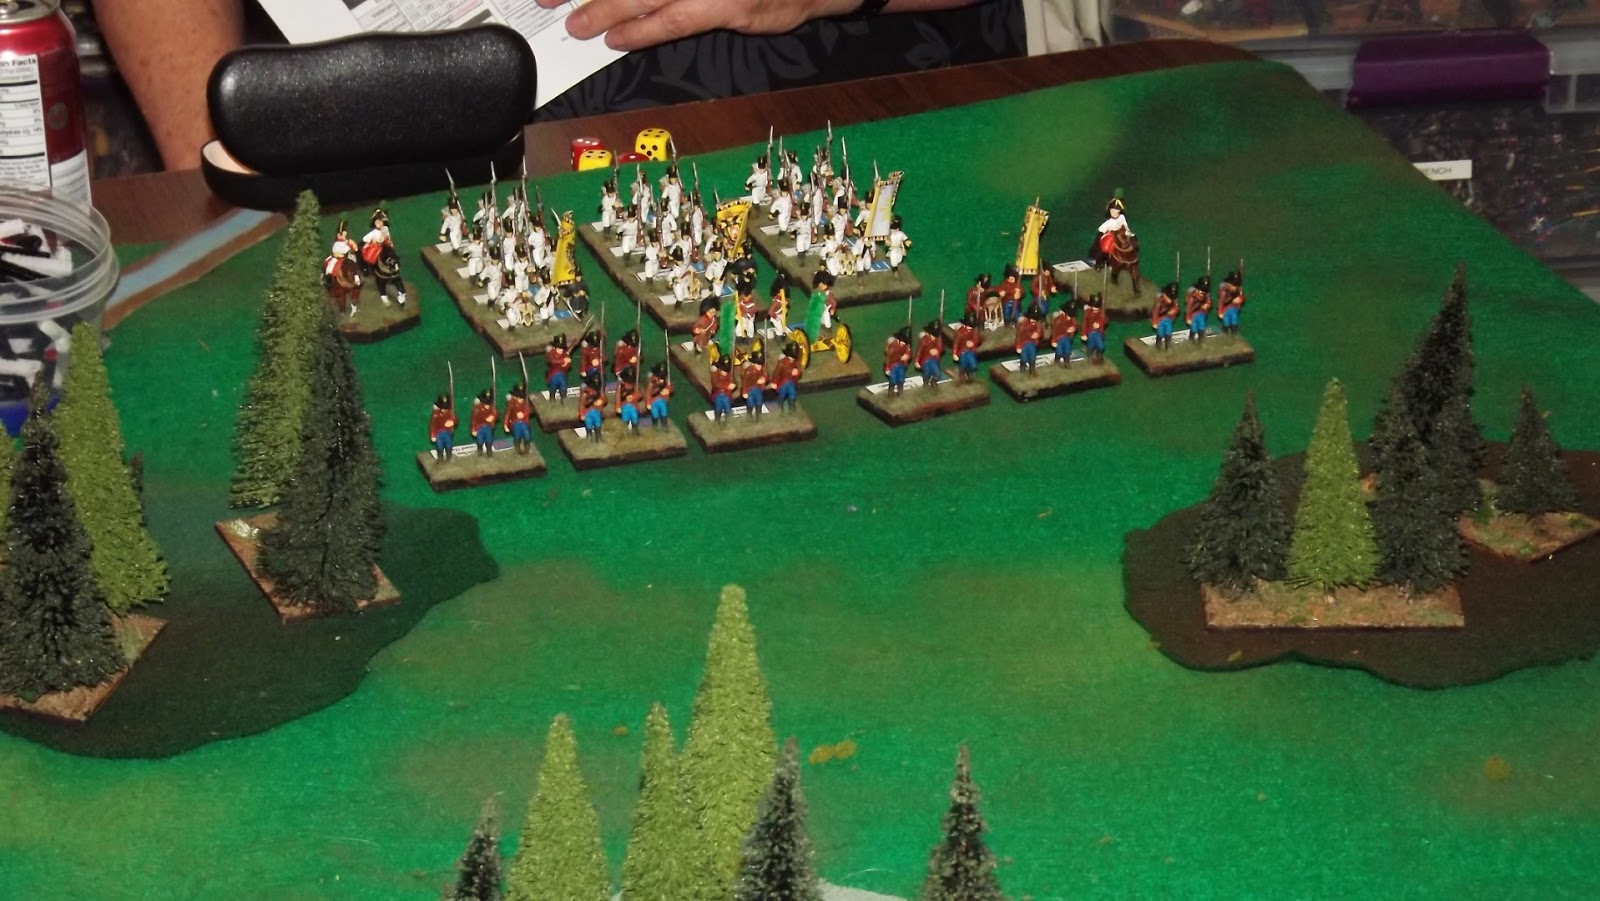
Last night I ran a new AWI scenario at the Northern Conspiracy's August game night using my Electronic Brigadier rules. This was a hypothetical AWI scenario prior to the Battle of Monmouth. The scenario pits Charles Lee's American Advanced guard against a portion of  the British column of march commanded by Sir Henry Clinton. The premise is completed by assuming that elsewhere to the west Lord Cornwallis and General Washington will square off in a separate battle and Clinton is to destroy Lee's force which is blocking the British route to Philadelphia. It's a seven player scenario, but with three veteran Electronic brigadiers and plus one additional player who was familiar with the rules we gave it a go.

The Americans, were led by Dick and Bob (below left) and the British were commanded by Charlie and Ralph (below right).


The Americans had two brigades comprised of mostly continentals and veteran state troops. Their final command was a New Jersey brigade of state troops and local militia. The British had an advanced guard comprised of cavalry, light infantry and Hessian grenadiers, the guards brigade and two full brigades of British line regiments. The guards brigade was bolstered by four twelve pound field guns.


 Bob's New Jersey brigade got partially over the stream that blocked their approach while Charlie deployed. One unit of militia guarded the stream bank to attempt to discourage a crossing by the British. Charlie's line unit there engaged across the stream in a firefight that eventually drove off the militia. Closer towards the center the British first light regiment and the Queens Rangers slugged it out with Bob's continentals in a bloody exchange where neither side wanted to leave. Eventually two of Bob's units including his militia and one of Charlie's started to waver towards the end of the evening.


On the west flank (British left flank) the British twelve pound battery sent out a devastating initial barrage which stuck home on a section of American three pound guns with a force that sent the gunners running. They eventually quit the field without the courage to return to their guns. On the far left flank the British engaged in long range musketry while Dick's Americans held their fire, waiting for a 'whites of their eyes' moment. Ralph's third brigade eventually advanced into close range and Dick got his shot which was effective, but the British morale wasn't put into question.

The climax of the fight was a series of charges in the center by the guard's brigade against Bob's Virginians. The initial charge was stopped by a stinging volley by the Virginians forcing the British to halt and conduct a firefight. In the next two turns Ralph brought up two fresh Guards regiments and charged the Virginians with a two vs. one attack that caused the Virginians to flee to the rear due to shaken morale. Bob's 4th New York continentals were in reserve and the only thing between the guards and the shaken Virginians.


With time running out we concluded the battle after 24 turns with the battle still in question, but with the British having the upper hand in terms of army morale state and units lost. Having a full seven players would have let us get a couple more turns in, but even considering that the conclusion was that casualties need to be more impactful in morale. Charlie and Bob each had units whose casualties should have caused them morale problems. An adjustment in this portion of the morale procedure will be made based on this. There were also some other procedural changes that were recommended that will be added.

Below is a short video of the game table during the game:


Mark put on a huge Crimean war battle using Charge of the Light Brigade rules. The battle pitted a huge array of British and Russian figure and also included his European farm complete with various and sundry farm animals. I believe in this one the British put the lead to the Russians and good. Russians shown below were George and Art (left). British were Dave and GM Mark.


Below is a short video of the game table during the game:


Greg ran a 1940 WWII game using Chain of Command of the Battle of Narvik. Chain of command is one of two WWII skirmish rule sets that are currently very popular with the Club. This year each game night has a featured game that is supposed to be 'not your ordinary game'. Greg offered this seldom gamed theater of WWII to fill August's extraordinary game slot.


Below is a short video of the game table during the game:

Tuesday, August 7, 2018

Saga Crusades Extravaganza at Mike's

First off, rumors of my demise are greatly exaggerated. Sorry to have not been posting lately. Family commitments and a three-week sinus infection has put a damper on gaming and painting. All is better now so gaming and painting has resumed. We now return to our regular programming in progress....

Last Friday my friend Mike (pictured left) invited a couple other club members and me to his house for an afternoon and evening of Saga 2.0. Mike has been running a few games at our club's monthly events recently. With the publishing of the 2nd edition of the rules and the Crusades army supplement, Mike has taken it upon himself to offer to get those in the club that are interested in Saga up to speed.

I showed up at Mike's in the early afternoon for some 1 on 1 games and after a dinner break, Charlie and Michael joined us. In the afternoon Mike and I were able to play three games with me getting to learn three different armies and their associated battle boards. All games were four point games with the basic scenario from the core rule book.

The first game I played a Mutatawwi'a force against Mike's Crusader force. These are fanatical eastern Muslim jihadist. Their battle board features many skills that allow them to lower their armor to increase their attack power. They also have the ability to sacrifice a figure to do a targeted attack on an enemy unit. The latter seemed a bit more modern of an interpretation, but the rest of the skills seem in theme for the period.

I set up my archers in a small palm tree grove and Mike calmly ignored it instead preferring to anchor his flank on his own grove. I got a lucky shot with my bows against his hearth guard (elite) unit and then we started trading figures in successive attacks. In the end I used my depleted bow unit to invoke the skill that sacrificed a figure to attempt to attack the enemy units. After a few attacks my bow unit was depleted, but Mike's remaining hearth guard unit was eliminated sealing the game.


Game two I chose the more traditional Milites Christi army and Mike tried again with the Crusader force. In this game I mismanaged one of my hearth guard units, isolating it behind a palm grove. Mike skillfully used the grove to keep my unit out of the battle fighting my army with his four units against my three. In the end I did finally get my hearth guard back thanks to aggressive pursuit by Mike and the accidental reserve unit turned the battle right at the end.


The third game Mike let me have his Crusader army with two units of warriors and two units of hearth guard. Mike opposed this with his other Crusader army 'The Twelve' which featured three mounted hearth guard units combined to form two six-figure mounted units with an eight-figure warrior unit backing them up. Mike's larger units hit like a truck, but once one was eliminated, the lower dice pool of the army became very limiting. I eeked out a win in this one. All in all I think Mike may have been 'letting the Wookie win' in order to give me a good tutorial on the rules.


After dinner Michael and Charlie arrived. Since Charlie was new to Saga, Mike played a couple of games with him while Michael and I squared off. Michael wanted to push the Crusaders so I ended up with the Mutatawwi'a again. This was a close fight with the two key moves being a long-distance charge from one of my foot warrior units (a Mutatawwi'a special attack) and some finishing suicide attacks.


For our final game Michael and I swapped sides and for this one the Mutatawwi'a came out on top again, but in a very close affair. Michael out played me by using an ability that put my own dice against me. His Mutatawwi'a ability reduced his armor, but in trade made my missed attacks damage my own troops. Michael chose the perfect time to spring this ability on me, when I had a maximum 16-dice attack. The ability cost me three extra damage, two of which I had to use one of my own abilities to abate, the third killed an additional figure on top of the losses from his attack. I had counted on my ability making the engagement safe, but that didn't work out quite as I planned. Late in the battle I made some desperate attacks, but Mike's troops held up. Well played. 

I ended up playing five very fun games, all to conclusion in one afternoon and evening. What a great day of gaming. Thanks to Mike for hosting and Michael and Charlie for the chance to get together. I wouldn't be surprised to see some Saga war band figures on the painting table in my future.

Sunday, July 1, 2018

Captain Sonar

Work and a wedding in the family has had me somewhat distracted away from the hobby. Hopefully these distractions are coming to an end soon. In the meantime I got in some board gaming at my friend Mike's house during his daughter's graduation (and gaming) party. Here a bunch of us are playing the frantic and fun real-time game Captain Sonar. For these games I played as the radio operator. This is a new role for me in this game and I found it to be quite fun. Next time maybe I need to step up into the captain's seat.


Wednesday, June 13, 2018

Luftwaffe Colonel and Seargent

When I found this pack of personality figures at Stoessi's Miniatures I new I had to have them. Growing up obsessed with watching Hogan's Heroes as a kid made Shultz and Klink part of my start in wanting to learn about WWII history.

I haven't done as good of a job painting these as the fantastic sample figures shown on the Stoessi's Miniatures website, but I think I've done a respectable job with them. I put some extra time into the faces and highlighting the uniforms. With them a miscellaneous figure from I believe early Warlord (pre Bolt-Action) that I just wanted to get out of the dead lead pile.

Schultz is seen in the TV series with Heer emblems on his helmet and collar tags. I've painted him with green Luftwaffe field division collar tags to match my previously posted figures.

Next up on the painting table are a pair of Hetzer tanks for vehicles. For figures on the table are the last of the Luftwaffe field division troops I will be painting. This last batch will be armed with the deadly Sturmgewehr 44 assault rifle. I hadn't intended to have a lot of STG44-armed figures, but when I got to the bottom of my lead pile, somehow I had more of them than I thought. Not a problem for Iron Cross, and for Bolt Action, they're a useful asset when desired. Between the Hetzers and the infantry, I'm unsure which will get finished first.


Tuesday, June 12, 2018

28mm Luftwaffe Field Division Squads

This is two squads/boxes of Warlord's Luftwaffe Field Division figures that I've just completed painting. I've gone with Vallejo Luftwaffe Uniform (#816) for the uniforms. The lighting wasn't great for photography, so the uniforms look very grey, you can trust me they're just the right shade of blue. Vallejo #816 is perfect in my opinion. For the splinter cammo on the smocks and tent halves I've gone with multiple sharp angle shapes and omitted the rain drops. In 28mm I wasn't confident I could make them look correct.

I've based these up singly similar to all my other WWII skirmish figures with the exception of the LMG. Since he was prone, and Bolt Action likes to know which figure the loader is, I decided to mount the loader on the SMG stand. For Iron Cross it doesn't matter, so this basing works for both of my favorite skirmish rule sets.

These 20 figures put my painted figure total back over my purchased painted figure total for the year. Next up on the blog, something special. Check back tomorrow!


Monday, June 11, 2018

Northern Conspiracy June 2018 Game Night

Last Friday was June game night for the Northern Conspiracy. There were three great games being run. First up was Ed M's late 30 Year's War skirmish game that I posted about earlier in a play test game report.

I only snapped a quick few photos of this game but from the after action Ed gave me over pancakes at the IHOP after the game night, it was a rip-roaring gunfight. Early looting turned to mayhem and killing with loot taking a back stage to combat towards the end.

More details for this game can be read at fellow conspirator Mark's blog, My Brave Fusiliers. 


Next up was Charlie bringing out an old favorite, 15mm Volley & Bayonet Napoleonics. A decade ago V&B was the majority of what we were playing for black powder period games. It's still a great option. Hopefully Charlie bringing the old favorite out will re-ignite interest in this rule set.

I played in Mark D's modern Bolt Action game. The scenario was a battle in the Falklands War.  I was part of the beleaguered Falkland defenders. My command was mostly the defensive weapon teams. Ralph and Michael on my team took the more mobile forces to defend the town from British attack. 


During the mid game Don launched a wire-guided missile at one of my bunkers. I took a chance and held tight hoping to weather the blast. The bunker held. That MG put some effective fire on Don's infantry, but my forward infantry marksman didn't fare so well, biting it from direct tank main rounds fired by Don. Late in the game Michael and Ralph teamed up to take out one of Rob's attacking squads while my MG took out Rob's MG. Kevin made some attacks against the town, doing some initial damage to Ralph's troops, but in the end Ralph was able to hold.

This was a fun game and Bolt Action seems to work well with the modern modifications Mark is using.


Wednesday, June 6, 2018

NROW Play Test Game at Charlie's

Last Friday a group of us gathered at Charlie's gaming loft to play another game of Napoleon's Rules of War. Charlie has been considering some revisions in the rules which we've been play testing. The changes hope to streamline the system a bit while retaining the historical accuracy.

The battle was Austrian versus French. Sides were chosen randomly. I ended up being the French left flank - a defensive command anchored on a farm with infantry and artillery. Opposite me, Earl with all three combined arms available. More on that later.


The aggressive Austrians: Earl, Byron, Mike and Ralph.

The French: Mark, Bob, Rob and me (the empty chair).


Our plan was to defend on our left flank and left middle with my larger but poorer quality command, while Mark's cavalry and high-morale command was used as a central reserve. On the right center and right we would attack. These photos show part of Charlie's impressive figure collection facing us...the white menace indeed.


The Austrians were having none of our French shenanigans. Earl pressed my command hard, pressed a wood I had defended with his Tyrolean Jagers and later repulsed my charge with a staunch defense by the same Jagers. Later he would obliterate that command threatening it with cavalry then destroying it in square with his horse guns. Well played.

In the center Mark and I ganged up on Byron's grand battery of 12-pound guns taking out a section early in the battle. Byron exacted revenge later on destroying Mark's heavy battery. At the end of the battle Earl's Jagers got too close to my batteries and were destroyed by the withering fire of the guns canister rounds.


While Earl, Byron, Mark and I were fighting a gentlemanly fight on the left, on the right it was pure bedlam. Rob's various attacks were repulsed by Ralph's Austrians while simultaneously Mike's attacks were repulsed by Bob's defense and counter-attacks. The telling blows were Mark's reserves finishing off a couple of Mike's well worn units. When we called time both armies were well mauled with the Austrians suffering only slightly more casualties than the French. A fun night with many good fights and great data for Charlie to work with.