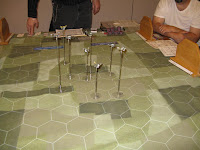
Tonight was another of our Early War North Africa Escalation League game nights at Adler Hobby. We had a good turnout with 5 players showing up and several other people stopping by to shop or kibitz. Chris R. returned after a recent absence due to being a new father. The evening featured three 600-point games for our league and a snack tray brought in by James with cheese, salami, peperoni and crackers - YUM!
I played only one game, intending on leaving early but in the end I stayed the whole night because I was having so much fun. My game pitted my Australian Commonwealth Infantry Company against James' German Panzer Schutzen infantry mounted in armored half tracks supported by a platoon of Pak 36 AT guns and a platoon of pioneers including a flame thrower.
Early on I didn't receive my reinforcements and James capitalized with a mounted assault from his infantry riding their half tracks of death. I survived only due to the fearless morale of the Australians and some lucky dice in my counter attack. The following turn my tanks arrived from reserve just in time to help mop up the infantry platoon and its half tracks. With only three platoons and the unenviable task of having to attack with infantry things went south from there for James. Honestly the game could easily have been won in the second turn with only slightly different dice rolls. James bold attack was his best chance of winning with his force in this scenario.
While James and I were playing our game Chris pushing his Polish infantry (using the British army list) was the attacker against Gordon's tough Italian Position de Fuscileri. Gordon has re-worked his list to have only one defensive platoon supported by Artillery and a small platoon of Italian tanks. This proved to be too tough of a nut for the Polish infantry to crack even using the British 'night attack' special scenario rules. The first time you face one of the new defensive platoons it can be intimidating, particularly if it's supported by armor and you have to attack with infantry. I think as we gain more experience with this new force type we'll all start to figure out how to play against it. So far both games against the defensive force have proved very interesting to be sure.
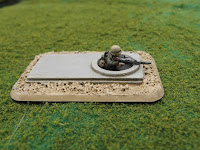
In Gordon and Chris' game Gordon borrowed two of my German machine gun nests to proxy for his Italian MG nests. I laser cut Gordon some parts for him to make up his own Italian MG nests which he'll probably work on soon. I'm looking forward to seeing what he does with them. Sharing stuff like this with the group is part of the fun for sure. Enthusiasm builds when you're hanging out with people who share interests. That's one of the things that's fun about this group of gamers.
In James' second game he played a German vs. German game against Adam's Medium Tank Company. This was a touch-and-go affair where the Pioneer flame thrower knocked out one of the tough Panzer IVs and the infantry knocked out most of Adam's light tanks but in the end the tanks held on just long enough to break the infantry company's morale.
Thursday, October 27, 2011
Wednesday, October 26, 2011
Roman Legion
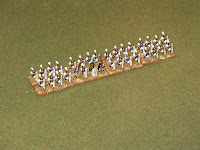
This is another Roman legion I purchased off of Ebay from an overseas figure painting service. The hand-painted white shields and white tunics are a stark contrast to most of my legions which wear red tunics and carry mostly red shields. I'm hoping to be able to use these figures to represent a lower-quality legion with lower morale. The eight stand unit will make two separate Field of Glory four-stand battle groups. All I'll have to do is paint up a four-stand velite unit (also in white tunics) and a two-stand triarii unit.
Although I don't always post units I buy that are already painted, I might start doing that more now that I'm showing an annual total of such figures on the listing on the left-hand side of this blog. I also wanted to show these because they're a good quality paint job and I was able to get them shipped to me at a total cost of only $1.50 per figure. I think that's quite a deal. If you're careful in watching the auctions there are still good deals to be had on Ebay even with the proliferation of overseas contract painters.
Monday, October 24, 2011
North Africa Heavy Machine Gun Nests - Finished
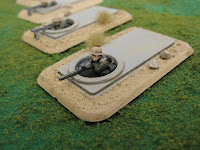
These are the four completed German heavy machine gun nests that I showed in my previous post. I've added some additional grass and rock details to the sand portion and dry-brushed the concrete with a couple layers of sand color to represent all the sand that would blow onto and over the nests. The Battlefront figures are a mix of two different poses, each armed with a heavy machine gun. Two have bi-pods and two do not, opting to rest the gun on the bunker's lip.
I won't be painting any more figures for this German force until I finish up the last couple of units to complete my Australian forces. I'm the type that if I start a new project before finishing the last the uncompleted project might never get finished. A bit of discipline is necessary here to combat my gaming ADD.
Labels:
Figures,
Flames of War,
Germans,
Lasered Items,
North Africa,
WWII
Sunday, October 23, 2011
North Africa Heavy Machine Gun Nest - WIP
While I was making some items for some customers on my laser today I designed a desert heavy machine gun nest for use with my North Africa forces. After I finish up my Australians I plan to start working on a German defensive force using the Hellfire and Back Stutzpunkt army list. This list requires two or four of these heavy machine gun nests. Battlefront sells pre-made ready to paint nests, but they've been out of production for a while. I like making my own terrain and doing interesting modeling projects so this seemed like a fun project. Design work on the laser's CAD only took about 15 minutes and I cut the pieces out of scrap wood from other larger customer jobs. The only things I had to add were a standard Battlefront medium sized base and a German crew member converted from a figure from my dead lead box. Below is a photo of the bunker in several states of completion. I'll eventually finish up all four of these for my German list and probably another four for my Australians to use if I want to use them as a Tobruk defensive force.
Labels:
Figures,
Flames of War,
Germans,
Lasered Items,
North Africa,
WWII
Saturday, October 22, 2011
Northern Conspiracy Game Night - October 2011
Last
night my club held it's monthly game night. I was fortunate enough to play in my friend Charlie's Carnage & Glory ACW game which was a scenario for the 150th anniversary of the Battle of Camp Wildcat. I was on the attacking confederate side and at the beginning of the battle I feared having the challenge of attacking troops defending wooded hills behind stone walls was going to be an impossible task, but differences in morale grades of the troops and quality of the leaders made this a very well balanced scenario. The Carnage & Glory computer system keeps track of army morale and although it said the Confederates scraped out a Pyrrhic victory, the Union held one of the two hills with solid troops at the end of the game and still had a skeleton force on the other. Considering the victory conditions the best I would claim would be a draw. This was a fun battle. We don't play enough Carnage & Glory games. The rules are fun, but if you don't play them a lot you forget some of the nuances of running and playing them. Maybe I'll make an effort to run a game or two myself soon to keep us in practice.
Andre ran a large game of Aerodrome with three rounds being played and the winner earning the coveted trophy cup as best pilot. I heard a lot of cheering and clapping from that area so everyone seemed to be having a whale of a good time.
Byron ran a Volley & Bayonet game for the Battle of Wandiwash 1760. This was a nice looking game that was the perfect size for game night, in that it took a good number of players while still being able to be played to a conclusion. Byron's linear stands and nicely painted figures looked great in this game.
Friday, October 21, 2011
Burning Empires - First Impressions
Last night I was able to steal a sneak peek at the upcoming Flames of War Burning Empires book at Adler Hobby. This is the third book in Battlefront's new Early War series and includes armies for the Italian and Greek campaigns as well as updated raiding rules for both early and middle war periods. Although I can't give a full review, these are my first impressions from the short time I had to spend with the book. My opinions are organized roughly by the book's major sections although I won't guarantee that I didn't miss anything. I'm writing this completely by memory. If you'd like to get a sneak peek at the book contact Gordon at Adler hobby and arrange a time to stop by his fine store and leaf through the preview copy.
Italy: There's one infantry list that can take all the usual support options including two platoons of M13/39 or M14/40 tanks. The infantry platoons range from normal sized to large to gargantuan to ridiculous topping out at 31 stands per platoon with all options added. There are additional morale options with Black Shirt and Alpine (elite) flavors although all still use the "3 Million Bayonets" rule.
Greece: The Greek lists include a mechanized list with motorcycle troops as the core combat platoon supported by hordes of Universal Carriers in platoons of five (5) and captured Italian tankettes in platoons of three (3). The list lacks much in the way of vehicle-based AT as all the vehicles are MG armed and the motorcycle infantry suffer the same fate ad the Hellfire and Back Italian Cycles - they cannot fire if they move. The other list is a Greek infantry list with lots of support from the same UC and tankette platoons. This list can take sufficient AT and Artillery guns to hold off enemy armor and could possibly have a similar feel to British UC horde lists if you wish. Interesting with Fearless Trained troops.
Germany: Germany offers some SS lists in the Motorcycle and Infantry flavors, not much new there. There is an Alpine infantry force and a Fallschirmjäger force that are slightly interesting but not much different than many of the other German infantry lists in the previous two books. The one gem here is a German glider infantry force that uses some new glider rules (included). I'm not sure why this list wasn't included in the Blitzkrieg book, but I'm thinking an Eben Emal historical scenario could use this list and glider rule set quite nicely.
France: There are Free and Vichy France lists. They're similar to the Blitzkrieg list mostly although with less armour choices and no armour-only lists. The Free French list can pull in several support platoons from British and Australian platoons also included.
Raiding Forces: The last 1/3 of the book is dedicated to raiding forces and desert fortresses. In addition to re-printing the existing SAS raiding lists there are many more added for most nations as well as some interesting desert fortress rules. Having all of the raiding rules in a hardcover book might make playing these smaller games more popular.
All in all I'm looking forward to having my own copy of this book even if I only use the raiding and glider airborne rules from it. The early war German glider company and Greek infantry company both also interest me enough that I may paint one or the other up at some point.
EW North Africa Escalation League (1)
This was the first game I was able to play in Adler Hobby's new early war North Africa / Italy Flames of war escalation league. Anxious to put my new Kangaroo tanks to use I chose to field my 600 point army as a commonwealth infantry company with a single platoon of three M13/39 tanks, a platoon of 3" mortars and a platoon of portee 2 lb. AT guns as support for my one combat platoon.
I drew as my opponent Gordon with his Italian Posizione Di Fucilieri (Defensive Infantry Position) company. Gordon wisely constructed his 600 point force to maximize his defensive assets including two AT nests and two HMG nests. All of which scared the hell out of me. Behind these was his artillery battery. The photo above shows starting deployment. We played the 'Trench Fight' mission which means the defender gets even MORE defenses. At the start I was pretty overwhelmed by this that's for sure, but things improved greatly when my initial bombardment for the scenario took out 3 of Gordon's artillery pieces.
A couple turns in I decided that in 6 turns I wasn't going to get my Infantry into the fight moving at regular speed, so I took a chance and double timed them counting on my mortars to smoke the defenders protecting me from their fire. Well the mortars didn't come in and I lost that platoon in one turn to devastating fire from the HMG nest, AT nest and defending infantry teams. We broke for dinner and I was thinking all was lost, but somehow I was able to assault with my one team of three captured Italian tanks under the cover of another smoke screen and miraculously through some lucky dice rolls managed to clear the defenders from the objective. My assault killed just enough infantry to force a company morale check which the Italians failed due to my assault also wiping out their HQ. Close fight which I was lucky to win and felt like I lost. Gordon was both a skilled and gracious opponent.
While Gordon and I played our game Aaron and Adam played a quick game on another table. Their game ended so quickly that I didn't get any photos of it. I'm not even sure who won!
After all of the Flames of War games ended Gordon and returning gamer James played a scenario game of Axis & Allies War at Sea which is pictured below. This game featured a British reprisal raid on a Vichi French Battleship in an all-or-nothing raid. This was a close fought game with Gordon edging out James in a battle of attrition where Gordon was able to preserve the target ship while reducing James force to below what would be needed to exact the desired revenge the scenario calls for.
Labels:
Adler,
Australian,
Flames of War,
Games,
North Africa,
WWII
Wednesday, October 19, 2011
Australian Captured Italian Tanks
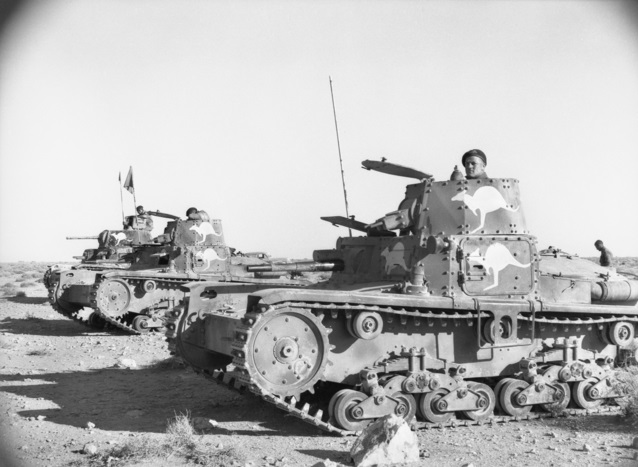
These eight tanks represent two platoons of captured Italian tanks from the North Africa theater that were turned against their original owners by the Australian army. In order to prevent friendly fire the plucky Aussies painted every available surface on the tanks with Kangaroos to make sure everyone knew who was inside. I originally saw a black & white photo of one of these tanks in a reference book and fell in love with them. When Battlefront came out with their Hellfire and Back army list book there were two different forces that were allowed to represent these tanks: the Australian divisional cavalry squadron and the Australian Commonwealth Infantry Company which can take up to two platoons of these tanks as a divisional support asset. That's all it took to seal the deal.
I've been working on the other elements of my Australian force for quite a while as followers of this blog are well aware. These hulls have been painted and patiently awaiting the release of the iconic kangaroo decals. Monday night I was able to pick these up at Adler hobby and get the tanks finished. I think these will make for a fun force to push in the early war.
Each platoon consists of three M11/39 tanks but can optionally be upgraded to include one of the slightly heavier M13/40 tanks in place of one of the lighter M11/39s. Since most of the photos I've found of this force (see below) include a mix of tanks I've chosen to make my platoons of this mixed variety. The extra two tanks are for the squadron CO and 2iC for when I choose to field these in a Divisional cavalry squadron.
The only complaint I have about these decals is that the sheet only includes one size kangaroo. Since this has to be small enough to fit on the small M11/39 turret it is a little too small for the hull. Another small nitpick is the sheet only contains 'roos facing one direction so you have to apply half of them glue side up. It takes very careful work to prevent silvering when doing this.
Next up are my final platoon of Crusader I tanks for early, or more likely mid, war and my last platoon of Australian infantry to finish up my commonwealth infantry company. I'm not sure what order I'll finish these in. It all depends on what I'm motivated to work on over the next week or two.
Labels:
Australian,
Figures,
Flames of War,
North Africa,
WWII
Tuesday, October 18, 2011
Busy Times
Sorry for the lack of posts. I've been very busy at home and work since returning from my vacation. I have several semi-finished projects I've been working on but none are in a blog-worthy state at the moment. I should have a flurry of updates coming soon when each of these projects comes to completion.
Time just seems to be melting away without anything completed to post. More soon I hope!
Monday, October 3, 2011
Mickey Mouse Dice!
Quick update from vacation. I picked these up at Disney's Animal Kingdom yesterday. Maybe they'll bring me some luck?
Sorry for the stock Internet photo. Our phones don't take very good macro photos. See you all when I return.
Subscribe to:
Posts (Atom)