Wednesday, February 28, 2018
W.I.P - 28mm Small Townhouse With Gable - Part 3
Tonight I finished the base coloring of the small townhouse. I used some cheap craft paints on the roof, so I need to let it all dry at least 24 hours. Later this week or maybe this weekend I'll finish up weathering the house which should make it table ready. I'm not entirely sure the hours put into the piece can be justified against the cost of the excellent Miniature Building Authority buildings, but there is the satisfaction of knowing that the piece is homemade.


Labels:
Bolt Action,
Iron Cross,
Lasered Items,
Terrain,
WWII,
WWII Skirmish
Monday, February 26, 2018
W.I.P - 28mm Small Townhouse With Gable - Part 2
Another night of progress on the small townhouse with gable. I've completed the applique stone work on the corners with some extra sprinkled in for texture. I've added doors front and back, a chimney and roofing made from polystyrene 'tile' roofing sheet. Next up a coat of paint on the trim, roof, chimney pipe and interior and some weathering.
I'm still undecided if I'm going to paint the corner stone work a different color from the field of the house. The main color is hardware store texture spray paint which has a very nice multi-color look to it up close. The digital camera plays tricks with it, but in person it looks a peach.


I'm still undecided if I'm going to paint the corner stone work a different color from the field of the house. The main color is hardware store texture spray paint which has a very nice multi-color look to it up close. The digital camera plays tricks with it, but in person it looks a peach.


Labels:
Bolt Action,
Iron Cross,
Lasered Items,
Terrain,
WWII,
WWII Skirmish
W.I.P - 28mm Small Townhouse With Gable
While helping one of my radio-controlled airplane friends with a project on the laser, I was showing him some of my wargaming items. As a younger man he also did some miniatures gaming. About half way through I showed him a stack of 'ideas' on my workbench. I quickly realized that I hadn't done a significant laser project in a while. I have a lot of Miniature Building Authority buildings. One that I've always wanted is their small stucco house with gable, but it's out of print. They have a couple that are similar that have replaced this one in their line. I figured I would take a shot at making something similar.
I've chosen to make these separate stories to make using figures inside much easier. The Iron Cross rules we play care if a unit is in a separate floor from another unit. The decorative band on the building I hope will hide the join line.
Still left to do is to add the corner stones detail applique and a few random stones in the field, then to tile the roof and add a chimney. Once that's all done I can give it a coat of paint. I still haven't decided if I'm going to make the roof flush with the side walls or not. Doing so will let the building be used adjacent to others in a town, but I think it looks less correct if the buildings have a small space between them.
Labels:
28mm,
Bolt Action,
Iron Cross,
Lasered Items,
Terrain,
WWII,
WWII Skirmish
Thursday, February 22, 2018
28mm Stone Walls - How many are enough?
A couple of weeks ago while visiting Adler Hobby, I purchased one package of round stone walls and three packages of block stone walls, both made by Pegasus Hobbies. These are a great value and can you can easily put them directly on the tabletop from the package. They come with a simple grey base color and light dry brush which is quite acceptable. The links above can be followed to see the 'before' pictures.
Not willing to leave well enough alone I picked out random stones on each piece and colored them one of three different shades, gave them a dark 'magic wash', dry-brushed them and then coated them with Mig weathering powder, Europe dust to finish them off. The round walls received a heavy dusting, the block walls a lighter dusting.

I think the extra work is definitely worth it. As a note, the Mig dust powder serves to de-saturate the colors as recommended by Mel the Terrain Tutor as I pointed out in my February 15th post which included his video.
 The title of this post asks how many stone walls are enough? The answer is probably that you can never have too many. I have a 6'x12' table. Each of these are 6" long. That means the 24 pieces shown only cover half of the length of the table if I line both sides of a road with them. The photo to the left illustrates the point. I have another 12 pieces of the round stone walls already, but that's still a few apples short of a bushel. With buildings, and other items I think I have enough to do the trick for a couple roads going across the width of the table or one road going diagonally lengthwise if I just stop a couple feet short of each end. There's always the option of only putting a wall on one side of the road, or using them to outline fields, etc. I'm counting these as 24 terrain/misc. since each one is painted and weathered taking considerable time.
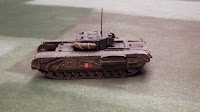
Also arriving in the mail today was a recent Ebay purchase, a Warlord plastic Churchill tank that I purchased pre-painted. There was some shipping damage so I had to replace the turret antenna and re-glue on some small bits on the fuselage. This tank was nicely painted and detailed but I did choose to give it a coat of Mig Europe dust to help it better match my other British armor. I didn't NEED a Churchill, but the Ebay auction was a good deal and the model was painted very nicely, so Bob's your uncle.
Not willing to leave well enough alone I picked out random stones on each piece and colored them one of three different shades, gave them a dark 'magic wash', dry-brushed them and then coated them with Mig weathering powder, Europe dust to finish them off. The round walls received a heavy dusting, the block walls a lighter dusting.

I think the extra work is definitely worth it. As a note, the Mig dust powder serves to de-saturate the colors as recommended by Mel the Terrain Tutor as I pointed out in my February 15th post which included his video.
 The title of this post asks how many stone walls are enough? The answer is probably that you can never have too many. I have a 6'x12' table. Each of these are 6" long. That means the 24 pieces shown only cover half of the length of the table if I line both sides of a road with them. The photo to the left illustrates the point. I have another 12 pieces of the round stone walls already, but that's still a few apples short of a bushel. With buildings, and other items I think I have enough to do the trick for a couple roads going across the width of the table or one road going diagonally lengthwise if I just stop a couple feet short of each end. There's always the option of only putting a wall on one side of the road, or using them to outline fields, etc. I'm counting these as 24 terrain/misc. since each one is painted and weathered taking considerable time.
Also arriving in the mail today was a recent Ebay purchase, a Warlord plastic Churchill tank that I purchased pre-painted. There was some shipping damage so I had to replace the turret antenna and re-glue on some small bits on the fuselage. This tank was nicely painted and detailed but I did choose to give it a coat of Mig Europe dust to help it better match my other British armor. I didn't NEED a Churchill, but the Ebay auction was a good deal and the model was painted very nicely, so Bob's your uncle.

Labels:
28mm,
Bolt Action,
British,
Figures,
Iron Cross,
Terrain,
WWII,
WWII Skirmish
Monday, February 19, 2018
28mm WWII British Armor
My previously finished figures were German, so giving equal time to the Allies, here are four pieces of armor to help the British, including a lend/lease M10 that I built up with generic markings to hopefully allow it to do double duty with my future American forces. The vehicles are, left to right, a Humber scout car, which I've up-gunned to a US .50-cal HMG, a Daimler Mk I, a Sherman Firefly, and an M10 Wolverine. All of the vehicles are Warlord resin kits with the exception of the M10 which is a Rubicon Models plastic kit. I've filled the lower hull of the M10 with epoxy and lead shot to give it similar weight to the resin models in my collection.

I've given these a healthy coating of mud in the tracks and a nice coating of 'European Dust' from Mig. There are four ex-tankers in our club and every one of them agree that no armor in the field isn't covered with a healthy layer of dust and grime. I can't see why WWII armor would be any different.
The Humber comes with a personality command figure in it so I figured I had to give him a good effort on the paint job. The .50 cal is mounted with a tiny magnet so I can swap it out for proper British kit should I want to use the vehicle with rules that care about that sort of thing. Considering all the lend-lease equipment in the European theater, up-gunning the Humber isn't much of a stretch in my mind.

These latest British vehicles put me over capacity in my current storage, so I had to split out my AT guns, Bren carriers and Jeeps into one tray and the heavier vehicles in a second tray. Even doing so the new tray looks almost as crowded as Bovington! It's a silly amount of armor for skirmish gaming, but at least I don't plan on using it all in a single game.......or maybe......evil grin.

I've given these a healthy coating of mud in the tracks and a nice coating of 'European Dust' from Mig. There are four ex-tankers in our club and every one of them agree that no armor in the field isn't covered with a healthy layer of dust and grime. I can't see why WWII armor would be any different.
The Humber comes with a personality command figure in it so I figured I had to give him a good effort on the paint job. The .50 cal is mounted with a tiny magnet so I can swap it out for proper British kit should I want to use the vehicle with rules that care about that sort of thing. Considering all the lend-lease equipment in the European theater, up-gunning the Humber isn't much of a stretch in my mind.

These latest British vehicles put me over capacity in my current storage, so I had to split out my AT guns, Bren carriers and Jeeps into one tray and the heavier vehicles in a second tray. Even doing so the new tray looks almost as crowded as Bovington! It's a silly amount of armor for skirmish gaming, but at least I don't plan on using it all in a single game.......or maybe......evil grin.
Labels:
28mm,
Bolt Action,
British,
Figures,
Iron Cross,
Warlord,
WWII,
WWII Skirmish
Saturday, February 17, 2018
28mm WWII German Weapons Teams
With momentum picking up in the club for Iron Cross, there's a lot of 28mm WWII being painted across the club. I'm not immune to the hype, with all of my currently active projects centering around my German and British skirmish armies. These are two units of German weapons teams, one 80mm Mortars (8 cm Granatwerfer 34 as the Germans would have referred to it) and one of MG-34 and MG-42 tripod-mounted MMGs. The mortars are from West Wind's Berlin or Bust line and the MG-42s are Warlord figures I believe. The digital camera settings make the bread bags and gaiters look very yellow. They're on the yellow side of khaki but not as crazy as the photos make them appear.

While I was at Adler Hobby the other day I purchased some Warlord panzerfausts. They're just the loose weapons for adding to figures. Most of my German riflemen I purchased pre-painted on Ebay. None of them are armed with Panzerfausts. I painted up these weapons and added them to some of my existing infantry to give them a bit more punch against allied armor. One pose really lent itself to this conversion better than the others, so you'll see most of these went on figures with that pose.
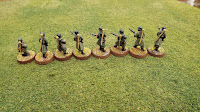
I'll count the efforts on this post as 16 figures painted (the weapons teams) and 8 'terrain/misc' for the panzerfaust conversions. Next up on the painting table are some British vehicles.
Labels:
28mm,
Bolt Action,
Figures,
Germans,
Iron Cross,
Warlord,
WWII,
WWII Skirmish
Thursday, February 15, 2018
De-saturating colors for terrain
Mel the terrain tutor added an excellent video recently about de-saturating colors for terrain. Useful tip usable on figures as well as terrain.
Monday, February 5, 2018
Mining Guild Tie Fighters
I've been looking at a lot of re-painted Star Wars X-Wing Miniatures ships lately and I wanted to get in on the action. Rather than just doing a re-paint, I thought I'd take a couple of tie fighters and convert them to Mining Guild Tie Fighters. The modeling part of cutting out the panels and sanding them to shape was easy enough. The difficult part was re-painting them. I started with a white primer coat, followed by yellow shot through my airbrush. After that everything else was brushed on. Getting the frames of the solar panels was very challenging.

I finished these one at a time. The tie fighter on the left was washed after spraying the model with clear coat and letting it dry. The model on the right was washed over the matte color base coat. The left one has better panel definition while the right looks a bit more dirty. I think I like the left one more, but I'm happy with both. Lesson for future efforts. Do both the same way.


I finished these one at a time. The tie fighter on the left was washed after spraying the model with clear coat and letting it dry. The model on the right was washed over the matte color base coat. The left one has better panel definition while the right looks a bit more dirty. I think I like the left one more, but I'm happy with both. Lesson for future efforts. Do both the same way.

Sunday, February 4, 2018
28mm Austrian Napoleonic Artillery and Grenzer Command
 These
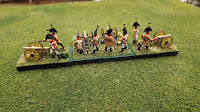
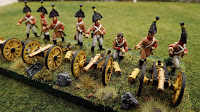
are my first completed figures of 2018. I seem to be a bit behind of last year's winter painting pace already. The first set of photos are four stands of Austrian 6lb field artillery. They are based for use with both Electronic Brigadier and Napoleon's Rules of War.
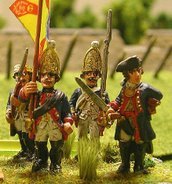
 The second set of figures are two command stands of Austrian Grenzers. Previously I painted up ten stands of Grenzers, but with only two command stands. That left me with the option of fielding two units of 3-5 stands. These add the option for me to field three units of four stands or four units of three stands. Both the artillery and the Grenzers are Old Glory figures. Total figure count: 18.
Labels:
28mm,
Figures,
Napoleonics,
NROW,
Old Glory
Subscribe to:
Comments (Atom)
