 Last Friday I ran my new Approach to Walcheren scenario at our club's monthly game night. Summer game nights are less well attended, but I still had four players for my game which was plenty. Here you can see the initial table layout. Changes made after the play test included adding a minefield and a stretch of barbed wire, and some minor changes to the way the engineer's satchel charge rule was played. I also slightly changed the German order of battle, swapping out the stationary Flak 37 anti-aircraft gun for a Flakpanzer 38-t giving the Germans a bit more mobility with this asset.
 German commanders Charlie and Bob set up some excellent defensive positions, including an ambush with the RSO Pak-40 anti-tank gun. Quite a historical use for that weapon. They did require a bog check to extract it from that position later in the game due to the rubble from the destroyed building.
 British players Adam and Rob attacked aggressively early with the British commandos that infiltrated the farm prior to the battle. The commando .50 cal MG took out the German infantry gun right off the bat, but was then itself silenced by combined German MG and Flakpanzer 20mm fire. Adam moved his armor off board for a turn in order to enter off road to avoid the minefield that blocked the road.
Mid game saw Rob's commandos and headquarters units bearing the brunt of continued effective German MG and Flakpanzer fire, his units withering. It appeared that Adam would have to carry the day. Adam's engineers and tanks pushed Bob's Ostruppen from the river forcing them to retreat out of sigh behind a hill. Adam's first engineers planted a satchel charge on the dragon's teeth near the radar station, but quick reaction by both German commanders combined to take the engineers out before they could blow the charges.
Rob pushed his last commado squad to the bridge sand bags, eliminating an Ostruppen squad that drew the unlucky short straw to defend there. Charlie aggressively pressed the tired commandos with his HQ squad and commander, but the Commandos held firm, and Charlie was forced to fall back with his HQ.
On the right flank Charlie's RSO Pak-40 got an ambush shot on both the M-10 and the Cromwell. The M-10 was lucky enough to deflect the hit suffering only some morale markers. The Cromwell was missed. Returning the favor the RSO somehow pulled off a miracle bounce of incoming main tank rounds from the Cromwell once, but was eventually eliminated by a direct hit from the Cromwell's main gun.
Like something from a war movie, Rob rallied his remaining commando squad and used them and their 'Red Devils' rule go great effect. He spent multiple 'follow me' chits to chase down Charlie's headquarters squad and commanding officer and eliminate them behind enemy lines in a close skirmish and blaze of Sten gunfire. Soon after, exhausted and alone in the German-controlled town, the commandos themselves were wiped out by a counter attack. Still the damage was done and the Germans had lost their senior officer and the command and control he adds to their efforts. (i.e. they lost their 'follow me' tokens).
Meanwhile on the right, Adam wasn't to be outdone and his second engineer squad was able to blow the dragons teeth with another satchel charge. The well coordinated attack of the commandos and the engineers proved too much for the Germans to deal with simultaneously and trying to save their commander took priority. With the Dragon's teeth cleared Adam's M-10 pressed over the ford to begin shelling the town and to engage the RSO Pak-40. Adam's Cromwell took up a central position opposite the town and began shelling the buildings.
With the ford secured and a British infantry unit already able to push across the bridge (albeit at a great cost), the victory was secured for the British. This was a close fought game and the British suffered significantly more casualties than the Germans accomplishing their goal. Had a few rolls gone their way the outcome could have definitely gone the other way. Well played by players on both sides. Adam, the only player who didn't participate in the play test, played particularly well with his infantry and armor both having great success with minimal losses.
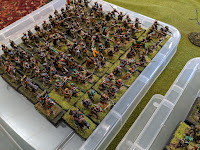
The other main game for the evening was the MASSIVE and spectacularly figured Crimean War game of the Battle of MacKenzie Heights put on by Mark of the My Brave Fusiliers! Blog. There are better pictures and a great write up of this game over on Mark's blog. (follow the link above).


Rounding out the evening, president Dick ran a table of Saga to help players get ready for our upcoming October game day which will use these rules.


2 comments:
Some good looking games and a good evening of entertainment 🙂
That looks like a fun evening... l think that I would be hard pressed to decide which game to join... they both look splendid...
All the best. Aly
Post a Comment