This is the last platoon of Crusader tanks for my British North Africa WWII army. These have been lingering on the painting table too long so I decided to just finish them up to clear some space for something new. I had initially intended on using these for early war, but they're just too damned expensive in points early war, even more so after Battlefront increased the cost for all of the British armor. These will still get plenty of use mid-war where they can form the core of a light tank swarm supported by my Grants and some Australian infantry and artillery. These are first-generation Battlefront models with the more modern styled turret which I like a lot. This platoon is adorned with blue triangle platoon markings on the turrets. The platoon commander had the hull MG turret left on more for identification purposes than for utility.
This will be my last post for January. I just thought I'd mention that it's been a VERY active month on the blog for me. The next most active month was 14 posts, which I've done a few times. This month I had 20 posts. That's a lot of painting, modeling and gaming! hopefully I can maintain momentum and continue to do a lot of fun stuff over the next few months. I know once the good weather returns to New Hampshire my wargaming hobby will suffer.
Tuesday, January 31, 2012
Monday, January 30, 2012
What Platoon Is THAT Tank From?
In my game last Saturday against Don casualties and time pressures (in the battle) required that I intermix my two platoons of captured Italian tanks and my 2iC tank. Since each platoon had suffered casualties the whole fur ball became a confusing mess. The captured Italian tanks historically didn't have unit markings on them other than whatever Italian markings were not covered up by the Aussies. My figures originally also had no unit markings which only added to the confusion of the situation.
After the game Don and Gordon had some recommendations on how I could identify my 2iC tank by adding a left-over Italian aerial recognition symbol (an off-white circle) to the top of the hull. I've done this as you can see in the right most tank in the photo above. Originally I had thought about adding some additional kangaroos on one of my platoon, but much to my dismay I had used up all of the decals I had. Reasoning that the small Italian unit markings could have been left on by the Australians I added some to one of my two combat platoons. This should help me differentiate each platoon and the 2iC. Thanks go to Don and Gordon for the good advice.
Labels:
Australian,
Figures,
Flames of War,
WWII
Sunday, January 29, 2012
Enter the Carthaginians
I've decided to start working on a Carthaginian army to add to my Punic Wars collection of Romans and Seleucids. These two units are the first two battle groups for the new army. I purchased both from Dynasty Group Miniatures on Ebay. The spear-armed unit on the left is a group of Celtibierian medium infantry. The unit on the right is a group of Spanish Scutari that is also based as medium infantry.
Dynasty Group did a decent job painting these figures. I'd rate them a solid 6.5 on the GAJO scale. They arrived with minimal damage thanks to great packaging. I had to re-attach two shields and a few spears were bent, but that's to be expected. Dynasty is slightly cheaper than Dragon Painting Service (also on Ebay) with a commensurate difference in quality. All in all I'm happy to have these added to my collection. They were a good value and an easy way to jump start this army.
Labels:
Ancients,
Carthaginian,
Field of Glory,
Figures
Saturday, January 28, 2012
Saturday Game Day at Adler Hobby
Today was one of our twice-monthly game days at Adler Hobby. The second such game day normally focuses on painting, terrain building and anything else we decide to do. Gaming of course is always on the menu if people bring armies and want to play. Several of us are considering supporting an upcoming benefit tournament hosted by our friends from the Boston Trained Bands club. To help support this effort I brought a couple of DBA armies so I could teach people how to play the rules.
The tutorial game started with Gordon playing the Greeks and Russ playing the Romans, but Don took over for Gordon when some new customers came to the store that needed help. All three players picked up the rules quickly and Don and Russ played a very good game with both making good tactical DBA decisions several times. In the end Russ squeaked out a win with the Romans with a score of 4-2 assaulting and capturing the Roman camp with a unit of Triarii. There's something you don't see all the time!
Russ had to leave but Don and I still had some time before Gordon had to close up shop so we played a 1500 point Flames of War game as part of our ongoing Campaign. Don brought his Fallschirmjäger company from the Burning Empires rule book, and I opted to use my Australian Divisional Cavalry Squadron. Don's Fallschirmjäger stands are beautifully based with tall grass and meadow flowers from Army Painter. They were so nice that I took the photos below so people can enjoy them.
For our game we played this month's featured mission 'Pincers'. Since I was using a mechanized company and Don was using an infantry I was the attacker and Don was the defender. Don placed his Artillery, Mortars and a large kampfgroup of infantry and weapons, including a very deadly recoilless rifle on the table and kept a platoon of Pak38 AT guns (proxied by Pak40 models) in ambush. The photos below show the first two turns. With delayed reserves I thought a bull rush attack was the best approach. I knew Don's AT guns and recoilless rifle would take their toll. I could only hope I could press him off the objective before my army vaporized.....then the Stukas came!
This was an interesting game. My Desert Rats dice show a rat when they roll a 1. Early in the game I was saying 'RATS!' a LOT. This meant a lot of bailed and bogged down vehicles some of which refused to get back into action for multiple turns. Don's fearless veteran Germans didn't need much luck early on to whittle me down. The combination of their high skill and my Australian's trained status meant Don was scoring a lot of solid hits.
A platoon of Bren carriers was bailed by the Pak38 AT platoon and finished off by an infantry assault, then 2 of 3 Humber II armored cars perished and then two of my captured Italian tanks died with the third failing morale (another RATS! moment). Just when things looked lost Don started to have a few turns of bad dice as well. Stukas failed to score kills, and after killing a PaK38 and their officer Don's remaining fearless gun decided they'd rather go to the rear for ammo. I was able to call in some smoke with my artillery at a critical time, and then Don's reserve rolls for turns 3 and 4 came up empty. With one last assault from my remaining few tanks and a spray of MG fire from behind the cover of a thin ridge I was finally able to eliminate Don's infantry platoon that was contesting the objective.
In turn five Don did get one reserve unit, but it was too far from the objective to contest it. Don attempted to storm trooper move a gun from his artillery battery to contest but it failed it's skill check to do so. Also in that turn Don's Stukas weren't able to kill enough of my force to force me to company morale so I squeaked out a narrow victory on turn six. If any one of a half dozen rolls that SHOULD have gone Don's way had, I'd be writing about a defeat instead of a victory. Don took it all in stride like the gentleman he is. This is why I like gaming with friends. Thanks for the fun game Don.
The tutorial game started with Gordon playing the Greeks and Russ playing the Romans, but Don took over for Gordon when some new customers came to the store that needed help. All three players picked up the rules quickly and Don and Russ played a very good game with both making good tactical DBA decisions several times. In the end Russ squeaked out a win with the Romans with a score of 4-2 assaulting and capturing the Roman camp with a unit of Triarii. There's something you don't see all the time!
Russ had to leave but Don and I still had some time before Gordon had to close up shop so we played a 1500 point Flames of War game as part of our ongoing Campaign. Don brought his Fallschirmjäger company from the Burning Empires rule book, and I opted to use my Australian Divisional Cavalry Squadron. Don's Fallschirmjäger stands are beautifully based with tall grass and meadow flowers from Army Painter. They were so nice that I took the photos below so people can enjoy them.
For our game we played this month's featured mission 'Pincers'. Since I was using a mechanized company and Don was using an infantry I was the attacker and Don was the defender. Don placed his Artillery, Mortars and a large kampfgroup of infantry and weapons, including a very deadly recoilless rifle on the table and kept a platoon of Pak38 AT guns (proxied by Pak40 models) in ambush. The photos below show the first two turns. With delayed reserves I thought a bull rush attack was the best approach. I knew Don's AT guns and recoilless rifle would take their toll. I could only hope I could press him off the objective before my army vaporized.....then the Stukas came!
This was an interesting game. My Desert Rats dice show a rat when they roll a 1. Early in the game I was saying 'RATS!' a LOT. This meant a lot of bailed and bogged down vehicles some of which refused to get back into action for multiple turns. Don's fearless veteran Germans didn't need much luck early on to whittle me down. The combination of their high skill and my Australian's trained status meant Don was scoring a lot of solid hits.
A platoon of Bren carriers was bailed by the Pak38 AT platoon and finished off by an infantry assault, then 2 of 3 Humber II armored cars perished and then two of my captured Italian tanks died with the third failing morale (another RATS! moment). Just when things looked lost Don started to have a few turns of bad dice as well. Stukas failed to score kills, and after killing a PaK38 and their officer Don's remaining fearless gun decided they'd rather go to the rear for ammo. I was able to call in some smoke with my artillery at a critical time, and then Don's reserve rolls for turns 3 and 4 came up empty. With one last assault from my remaining few tanks and a spray of MG fire from behind the cover of a thin ridge I was finally able to eliminate Don's infantry platoon that was contesting the objective.
In turn five Don did get one reserve unit, but it was too far from the objective to contest it. Don attempted to storm trooper move a gun from his artillery battery to contest but it failed it's skill check to do so. Also in that turn Don's Stukas weren't able to kill enough of my force to force me to company morale so I squeaked out a narrow victory on turn six. If any one of a half dozen rolls that SHOULD have gone Don's way had, I'd be writing about a defeat instead of a victory. Don took it all in stride like the gentleman he is. This is why I like gaming with friends. Thanks for the fun game Don.
Labels:
Adler,
Ancients,
Australian,
Flames of War,
Games,
North Africa,
Roman,
WWII
Friday, January 27, 2012
FOW Italian Vineyards - Review and Upgrade
While I was at Adler Hobby last Thursday I was able to buy one of the new Flames of War Battlefield in a Box Italian Vineyards sets. Honestly I'm planning to use these more for ancients games using the Field of Glory rules than I do with WWII Flames of War. These are the perfect size for vineyard terrain pieces in FOG. The retail cost is $25.00 which may sound like a lot for two pieces of terrain, but the bases are made of a very durable semi-hard rubber and the eight removable vine rows are made of durable hard resin. The best part is they all come painted with good detail right down to ripe grapes under the vine canopy. They come ready to drop on the table right out of the box as shown in the two photographs below. Considering all that I think they were a good purchase.
Not being able to leave well enough alone I took an additional 20 minutes or so to spruce these up a bit more. I thought the brighter of the two greens on the vines looked a bit too 'fluorescent' for my tastes and the striping of the colors a bit too distinct. A quick dry brush with some white PVA glue followed by some blended turf seems to bring the look together a bit more for my tastes and I think adds some realism. The Brown bases seemed a bit too well manicured so again some sporadic patches of PVA glue followed by my favorite static grass blend - Scenic Express spring meadow blend were added. The end results of my 20 minutes of work are shown below - ready to be seen on the tabletop in my next Field of Glory ancients games!
Australia Day - EW North Africa Escalation League (6)
Last night I celebrated Australia Day by going to Adler Hobby for one of my infrequent Thursday night visits to play in the early war North Africa FOW escalation league. I missed this past Saturday due to other commitments so I wanted to get in a game or two. My first game was a 1750 point game using new scenario called "Pincers" which will be in the new 3rd edition book. This scenario had my Australian infantry deploying half their force with delayed reserves against Adam's attacking German armor force.
Adam's force contains two platoons of tanks: one Panzer IVd and one Panzer IIc along with some pioneer infantry, a battery of 10.5cm leFH18 artillery and a single 88 AT gun. Very high quality, but low quantity. My Australians are quite the opposite, I had ten (10) platoons all fairly inexpensive, with the exception of my battery of OQF 18/25 artillery. To reach 1750 points I to have to use everything I have painted up for the Aussies, including much to Adam's dismay three platoons of AT guns and two platoons of light Italian tanks (which never got to the battle).
I was afraid of being overrun by Adam's tanks early so I deployed both of my infantry platoons on the table to act as a 'speed bump' delaying force while I waited for reserves. Behind them I put my artillery in a direct-fire position supporting the infantry, one platoon of captured Italian 47/32 AT guns on one flank and I held a platoon of 2 pounder AT guns in ambush. They were placed interspersed with the artillery on my first turn.
This was a tough draw for Adam as far as match ups go. My AT assets are a nightmare for a small tank force and I had early success with my 2 pounders and 18/25 artillery firing over open sights against Adam's Panzer IVd platoon eliminating it, and my Italian 47/32 AT platoon scored just enough bails and kills on the Panzer IIc platoon to cause it to take a platoon morale check which it failed. I also was VERY lucky with all my saves from Adam's artillery and 88 hits in his first turn making 5 gun saves in a row - all sixes, three in one turn shown above.
Adam took everything in stride and was an excellent sport about it and chose to continue attacking with his infantry. He knew it was a lost cause, but took the sportsmanly route to finish the game aggressively rather than concede the game early. I have to compliment him on this I can't say I would have had the fortitude not to toss in the towel. On my third turn I received one reserve unit and chose my scout patrol of six Bren carriers. With Adam's tanks all but eliminated the bristling Bren and Boys guns on the carriers made short work of the remaining infantry. For Australia day my troops were able to celebrate a victory.
Our first game finished so quickly that we finished before Gordon and Chris could finish setting up their game. Instead of sitting around Adam offered me a re-match with his Free French against my German Stutzpunkt. For this game we had to play at 1250 points as that's all the Germans I currently have painted up. We rolled in Gordon's new random scenario book and drew the "Counterattack" scenario that neither Adam or I had played before which had me defending one corner while Adam attacked it or another objective in the corner opposite his deployment. I was fortunate in that I only had one platoon with vehicles (four Panzer IIc tanks) so I was able to start with my entire small force on the table. Adam's giant free French force also started on the table and Adam wisely used his national ability to move the unguarded objective even closer to his deployment zone.
With recon moves and first move Adam was contesting that objective on turn one. We miss-read the objective and didn't realize that the objectives don't go 'live' until turn six (6) so I double timed my Panzer IIs to contest bogging two on the railroad tracks and another in the rough terrain near the objective. A single brave Panzer IIc stood between me and defeat! Adam was able to soften up my Stutzpunkt by surgically destroying my gun bunkers with his artillery direct fire and silence the rest of my static forces with smoke and pins from his copious mortar fire. My Stukas were ineffective all game so it was up to my Panzer IIs and a tiny infantry gun platoon to secure the remote objective. My MG gun pits seemed to be holding the line on my objective.
Honestly I thought this game was all but over on turn one. After 6 more turns Adam's Hotchkis tanks and my Panzer IIs were still at a standstill although I was able to dispatch his Australian Bren carriers and most of one of his AT platoons. In the end we had to call the game at 1am as a draw. This was a MUCH more exciting and fun game than the first one. I only wish we could have played it first so we could have finished it.
Labels:
Adler,
Australian,
Flames of War,
Games,
Germans,
North Africa,
WWII
Thursday, January 26, 2012
Wednesday, January 25, 2012
See you in the funny papers
Last week the local newspaper stopped by Adler Hobby to do a local interest article about the store and the wargaming hobby in general. I was there along with several of the 'Thursday Night Irregulars' for one of our FOW league games. The photographer popped the action photo of me shown to the left as well as some other nice photos. If you'd like to read the whole article or view the photos the photographer took you can see them on their website here.
Sunday, January 22, 2012
BP Freeman's Farm & Northern Conspiracy Game Night
Last Friday night I ran my Black Powder Freeman's Farm game at our club's game night. We're still learning the rules so we made a couple mistakes but still ended up with a fun game. This was a very closely fought game for the entire night. At the end the British force saw the German flanking force exhausted while the Americans had Poore's brigade becoming very close to exhaustion due to suffering several lost units. All but a draw I called this one a narrow British victory as I felt that they had a slightly better position. It wouldn't have been inconceivable that a few more turns could have easily seen the tide turn towards the American's cause. Photos here are in roughly chronological order.
We had two other great games at game night. New pledge member Gordon ran his modified Axis & Allies War At Sea game with a Mediterranean 1940 hypothetical scenario and Earl ran his popular Brother Against Brother ACW game with it's beautiful terrain. Reports from both games were that they were very enjoyable. I was too busy running my game to spend a lot of time watching either game but took the snapshots below of them in progress.
Also Andre was present and received the Sportsman of the Year trophy that the club elected him to receive at our November business meeting. Congratulations Andre!
Labels:
American,
AWI,
Black Powder,
British,
Games
Friday, January 13, 2012
Black Powder - Freeman's Farm Game
Tonight we played the Freeman's Farm Black Powder game that I set up earlier in the week. I had initially intended on playing the game verbatim from the book, but with extra players expected I expanded the scenario with some creative alternative history. I put Von Breymann's brigade for the British on a faster timetable for their arrival and for the Americans I engaged Patterson's brigade in the battle when historically they remained on Bemis heights. This gave me what I thought would be a good 6-person game. My friends George and Byron played the British While Chris, Charlie and Mike played the Americans. We had one last minute cancellation so Byron and George let me as GM push Von Breymann's flanking force. By the time they arrived the game was mostly running smoothly so I was able to have a little fun pushing troops and answering only the occasional question about rules, etc.
The British had GREAT command rolls in their first few turns and entered the game at almost a dead run crossing the stream and setting up the beginning of some good battle lines. About two-thirds of the way through deploying their lines they had some commanders start to falter and issue only partial commands, but nothing that seriously hampered them.
The Americans were not as fortunate and trickled on at a much more leisurely pace. In the photo above you can see the British mostly deployed while Poor's brigade in the east (top of the photo) are still marching on and Learned's brigade in the west (bottom of the photo) are also bottled up a bit on the road by the British Indians and Canadian loyalists.
Things stabilized and entered into a general engagement after that. Dearborn's regiment held up the British advance in the Farmhouse while Poor's brigade with good support started to soften up Hamilton's (British) brigade. In the west Fraser's (British) brigade was fairing better against Learned's brigade with Patterson's brigade rushing into the middle of the battlefield to plug a gap caused by Poor's brigade's slow deployment. (See below two photos)
As the battle rolled on Learned's brigade finally collapsed in the west but Patterson was able to fill the void left in the American lines due to some of the mounting casualties on some of Fraser's units. Just after the left photo below was taken Poor's brigade finished off Hamilton's brigade collapsing it. With only one unit lost Poor turned it's attention to the German attack on the eastern flank. (see photo below right.
We ended up calling the game around 11:45. We probably had 3-4 more turns to come to a clear conclusion, but as GM if I were to call it I'd say the British had a slight advantage. Although Hamilton's command was collapsed, his two-gun battery could still continue to punish the Americans and Fraser and Von Breymann's brigades were still quite strong. Poor's brigade was fairly strong as was Patterson's but the American commands were of lower quality and Patterson's command was fairly small.
This was a very fun game to run and everyone played well and picked up the Black Powder rules fairly quickly. Some liked the rules a lot more than they expected to which was a fun surprise. With the outcome so close to a draw the big winner was everyone for having fun!
Labels:
American,
AWI,
Black Powder,
British,
Games
Thursday, January 12, 2012
EW North Africa Escalation League (5)
Tonight I popped into Adler hobby for one of my rare Thursday night games. I was able to play a game with my German Stützpunkt company. Chris was the attacker with his Polish infantry company complete with a platoon of two Matilda tanks which I feared very much. I deployed a maximum amount of mines and barbed wire. Chris paid dearly to gap the minefields losing several infantry stands, but once he successfully cleared a section his Matilda tanks made short work of the barbed wire (see below left).
My only answers for the queens of the desert were my Stuka dive bombers and a single 88 gun pit. Chris chose to make a night attack which is his option when attacking with commonwealth infantry (Chris' Poles use the Australian fearless trained list with some of his own self-imposed restrictions for historical accuracy). After dawn broke I got one pass with my Stukas but I only was able to bail one Matilda which re-mounted the next turn easily. My 81mm mortar platoon did cause Chris' infantry quite a bit of trouble eventually causing one platoon to make a break check, which it failed even though it was fearless. Chris re-rolled using his CinC but failed a second time removing the platoon and officer. I can sympathize with Chris, this is the type of luck usually reserved for ME! Unfortunately Chris also had a very bad streak of luck when his Matildas pressed forward into a wooded hill in order to avoid my 88 gun pit - BOTH tanks bogged down (see below right). I was able to swoop in with my infantry platoon and jump the helpless tank crews eliminating the Matilda platoon. At the same time my Panzer IIc platoon was able to shoot up Chris' second infantry platoon with MG fire and close with an assault which, thanks to the earlier damage caused by my mortars, was enough to force it to check morale which it also failed even though it was fearless.
Being below half company strength Chris auto-failed his company morale check due to his CinC leaving the table earlier in the game. I have to say Chris played very well and his dice robbed him of a better performance. Without several streaks of bad luck I think he would have rolled over my small defensive force easily with his fearless infantry and Matilda tanks. Next time we play we'll be at a higher point total. I'll need to bring TWO 88 gun pits to deal with the Matildas. One is too easy to avoid, which Chris demonstrated to me with great skill tonight.
Labels:
Adler,
Flames of War,
Games,
Germans,
North Africa,
WWII
Wednesday, January 11, 2012
Black Powder Game - Freeman's Farm Set Up
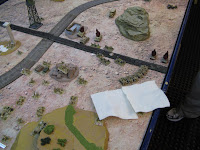
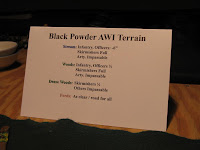
I'm hosting my first Black Powder game on Friday. Since it's my first time I'm using the Freeman's Farm scenario from the rule book with very few changes. I'm going to be out gaming tomorrow night so I had to set everything up tonight in preparation for the game. Below are a few photos of the tabletop and a couple of photos of some table tent reference cards I made to help us keep track of what the different status markers mean.
Subscribe to:
Posts (Atom)